

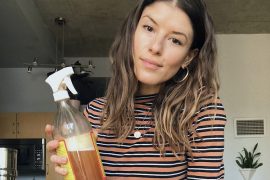
Aneta is a vegan foodie, plant lover, textile designer, and contributing editor for Earth Mamma. Stay tuned for more posts about all things plant based like gardening, herbalism, and some fun DIY’s.
Some of us are stuck in a city core or just don’t have full on gardens but that shouldn’t discourage you from growing some of your own goodies! Nothing is as rewarding as being able to harvest food that you have grown yourself to nourish your body. My friends have always come to me and asked for advice on gardening or taking care of their plants so this is a little guide that I wanted to share with you all.

CONTAINERS
First things first, choose your containers wisely. I mostly like to grow in clay pots or glazed clay pots. They keep moisture and are natural. I try to stay away from growing edible plants inside of plastic or a container that I am not sure what it’s made of. If you’re really into a pot you have but are worried about leeching toxic things, find a clay pot to fit inside of your fancy pot to separate the soil from the outer pot. Another thing that I look for in a container/pot is a drain hole. One of the biggest problems with killing plants is over watering and if you have no drainage then you risk the chance of rotting the roots of the plants. I have drilled holes in the bottom of some pots by soaking them first and drilling slowly as to not crack the pot (I had to do this to save one of my indoor plants that I put outside to give it some extra sun and it happened to pour rain for a few hours while I stepped out! Ooops!)

SOIL
There are so many types of soil that it can become very overwhelming. What you need to know is that there is a difference between the soil that goes into an actual yard vs. the soil that goes into pots. With potted plants you have to provide the roots with oxygen and drainage, whereas plants that grow in the ground already have drainage. So if you are picking out a soil for your potted plants just make sure it is labeled potting soil – if you are unsure the people that work at the garden centers will certainly help. If you can’t find any or you are the type to do things yourself you can make your own potting soil by mixing 1 part compost, 1 part peat moss, 1 part vermiculite (a type of mineral that looks like gold flecks or puffy white balls)
Secondly – buy organic soil! There isn’t a huge price difference here and quality is everything. You’re growing a plant that will soak up anything you give it and then you will be eating it so don’t skip out on the organic stuff!
Sometimes soil can be labeled by what you want to grow such as fruit vs. flowers. Whatever you end up choosing just make sure it’s for pots, organic and safe for growing food.
FERTILIZER
Another thing you can add to your soil is a fertilizer – you can buy organic dry fertilizers that you mix into the soil as you are potting your plants. There are also fertilizers that you can use in your water if your plants are already potted. I will go into more detail about this in another post.
This year I am adding a new product to my garden; a Worm Castings Plant Tea (aka worm poop!) from Urban Harvest. It has a high nutrient content and neutralizes the pH in the soil. I will be talking about this as I gain some experience with it this season along with pests and how to control them.

SEEDS & SEEDLINGS
If you are starting your plants from seed – do so immediately! Depending on what you plan on growing this year some plants need to be started as early as last fall – like garlic (and somehow year after year I keep forgetting to plant some!) and other plants don’t do well until the end of summer when cooler weather approaches. Plants like lavender and rosemary need to be started quite early – months before the last frost. And other seeds like radishes need to be planted later in the season in cooler weather otherwise they will shoot too quickly in too much heat. Pretty much every seed packet you buy will have instructions on best practices – if you are unsure, Google is a great place to find out! My favourite seed brand in the city is Urban Harvest, I find them at the local farmers market and around Toronto’s health food stores. They offer so many beautiful, organic, heirloom varieties that it’s nearly impossible to decide which ones to choose, especially when you only have a small balcony! Once you have your pots figured out, you should make a plan for yourself – especially if you’re working with a larger space like a big patio. Make yourself a quick sketch of where you plan on growing all of your plants, giving them enough space to grow beside each other.

To start my seedlings I like to buy a few things – the ‘mini green houses’ that fit along a windowsill work great. I fill jiffy pots with soil (they are pots made out of peat moss that you can plant directly into the soil when the seedlings have grown enough and they will decompose and give nutrients/drainage to the plant). Then I stick those pots right into the little compartments (as you can see in the green tray in the first photo). I also use the little soil pucks that come inside of the mini greenhouse containers, which just need to be watered first so they swell up and then they are ready for seeds to be pushed into them. Be sure to keep your seedlings well watered and moist at all times – seeds need a lot of moisture, they need to wake up and germinate. If you’re using the cover to keep moisture in, be sure to always check for any mold growing. If you see unusual growth clean it out and leave the lid off for a day or two to circulate the air. If it’s warm enough you can even air them out outside during the day. I wait until the seedlings have popped out for a few weeks and only pot my plants when I know there is no chance of frost returning.

Here is a small portion of what I am growing this year in the little soil pucks. From left to right I have: sunflower, black cherry tomatoes, lemon basil, cilantro, chives, dino kale and rainbow chard.
WATER & TIME
This one is pretty important: you need to know that with a lot of potted plants requires a lot of watering. Some containers will hold less water than others and may require you to water them almost every single day in the summer and sometimes twice a day on the really hot days! Make sure you have enough time to have a garden and take care of it too. I love spending time outside watering and caring for my plants after work, it’s my moment of disconnect, quiet and meditation with all of my plant babies!
There are also lots of interesting ways to make your own self-watering containers and lots of products available in the market. This season I decided to invest in a self-watering grow bed from a company called Noocity, which makes their products in Portugal. They say that you can go three weeks at a time without having to water because you just fill the reservoir with water and it feeds the plants from the roots up (plants love that the most). There are also very cost efficient ways to help water your plants that I would love to explore in the near future of the rest of my plants that won’t be living in my new grow bed.
Questions? Please feel free to ask in the comments below!
Happy Growing!!!
 Some of last year’s harvest.

Great post! I learned a lot….inspired to plant some veggies this year!
Would love to know what you’re planting!
I had a veggie garden for years, years ago. Loved going to the garden and picking fresh veggies for supper! Going to start easy and small so I will maintain it…thinking some greens, some herbs (which I always plant on my deck…basil, oregano, thyme, lavender), cherry tomatoes, green beans, peas, garlic, maybe some kale! I really loved your post, looking forward to the next one.
Hi Aneta! Thanks for mentioning our Noocity Growbed in your great post! Anyone interested in getting more information on how it works can check it out at http://www.sundialinnovations.com/noocity-growbed.html Please keep us posted on how your growing goes!
I will definitely let you know how it goes! Cannot wait to move my seedlings to the growbed! Keep in touch 🙂